Access IoT Behind Router Raspberry Pi Example: Your Ultimate Guide
Hey there, tech enthusiasts! If you're reading this, chances are you're diving headfirst into the world of IoT and Raspberry Pi. Let’s be honest, the idea of accessing IoT devices behind a router can sound a bit intimidating at first. But don’t worry, because we’re about to break it down for you step by step. Whether you’re a seasoned pro or just starting out, this guide will help you navigate the ins and outs of setting up your Raspberry Pi to connect with IoT devices from anywhere in the world. So grab your favorite coffee, sit back, and let’s get into it.
Now, before we dive deep into the nitty-gritty details, let’s talk about why this matters. Imagine having the power to control smart home devices, monitor environmental sensors, or even manage industrial equipment—all from the comfort of your phone or laptop. Sounds cool, right? But to make that dream a reality, you’ll need to understand how to set up your Raspberry Pi properly so it can securely access your IoT devices behind your router. Stick around, because we’re about to show you how it’s done.
One quick note before we proceed—this isn’t just any old tutorial. We’ve packed this guide with practical tips, real-world examples, and actionable advice to ensure you not only understand the process but also avoid common pitfalls along the way. Ready to level up your tech skills? Let’s go!
Table of Contents
- Introduction to IoT and Raspberry Pi
- Raspberry Pi Setup Basics
- Router Configuration for IoT Devices
- What Is Port Forwarding?
- Securing Your IoT Connection
- Dynamic DNS Explained
- Setting Up Remote Access
- Troubleshooting Common Issues
- Best Practices for IoT Deployment
- Wrapping It All Up
Introduction to IoT and Raspberry Pi
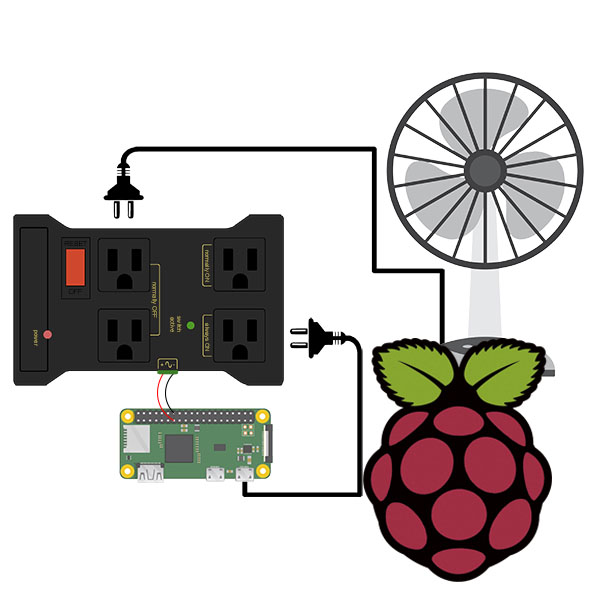
IoT, or the Internet of Things, has revolutionized the way we interact with technology. From smart thermostats to industrial automation, IoT devices are everywhere. But what happens when these devices are tucked away behind your router, out of reach from the outside world? That’s where Raspberry Pi comes in. This tiny yet powerful computer can act as a bridge between your local network and the internet, allowing you to access your IoT devices remotely.
Think of Raspberry Pi as the Swiss Army knife of tech projects. With its low cost, versatility, and ease of use, it’s become a favorite among hobbyists and professionals alike. Whether you’re building a home automation system or monitoring remote sensors, Raspberry Pi can handle it all. But to unlock its full potential, you’ll need to know how to configure your router and set up secure connections.
Before we move on, let’s clarify one thing: this guide assumes you already have a basic understanding of networking concepts. If terms like IP addresses, port forwarding, and DNS sound like gibberish, don’t panic! We’ll explain everything as we go along. Now, let’s dive into the setup process.
Why Use Raspberry Pi for IoT?
- Cost-effective solution for home and small-scale projects
- Highly customizable with a wide range of software options
- Strong community support and tons of tutorials available
- Perfect for beginners and advanced users alike
Raspberry Pi Setup Basics
Alright, let’s get our hands dirty! The first step in accessing IoT devices behind your router is setting up your Raspberry Pi. While there are many ways to do this, we’ll focus on the most straightforward method: using Raspberry Pi OS. This lightweight Linux-based operating system is specifically designed for Raspberry Pi and offers everything you need to get started.
Here’s a quick rundown of what you’ll need:
- Raspberry Pi board (any model will do, but Pi 4 is recommended)
- MicroSD card with at least 16GB capacity
- Power supply compatible with your Raspberry Pi model
- HDMI cable and monitor (optional, but helpful for initial setup)
- Keyboard and mouse
Once you’ve gathered all the necessary hardware, follow these steps:
- Download the latest version of Raspberry Pi OS from the official website.
- Use a tool like Balena Etcher to flash the OS image onto your microSD card.
- Insert the microSD card into your Raspberry Pi and power it on.
- Follow the on-screen instructions to complete the initial setup.
Pro tip: If you’re planning to use your Raspberry Pi headless (without a monitor), enable SSH during the setup process. This will allow you to connect to your Pi remotely via your laptop or another computer.
Router Configuration for IoT Devices
Now that your Raspberry Pi is up and running, it’s time to configure your router. This is where things get interesting, because routers are the gatekeepers of your local network. Without proper configuration, your IoT devices will remain hidden from the outside world.
Here’s what you need to do:
- Log in to your router’s admin interface using its default IP address (usually 192.168.0.1 or 192.168.1.1).
- Locate the DHCP settings and note down the IP address assigned to your Raspberry Pi.
- Set a static IP address for your Raspberry Pi to ensure it doesn’t change every time you reboot your network.
By assigning a static IP, you ensure that your Raspberry Pi always has the same address, making it easier to configure other settings later on.
Why Static IP Matters
Imagine trying to find your way around a city without a map. That’s essentially what happens when your Raspberry Pi’s IP address keeps changing. A static IP acts as a permanent address, allowing you to reliably connect to your device no matter what.
What Is Port Forwarding?
Port forwarding is one of those terms that sounds complicated but is actually pretty straightforward. Think of it like a mailbox at your local post office. When someone sends you a letter, the post office forwards it to your specific mailbox. Similarly, port forwarding allows your router to direct incoming traffic to a specific device on your network—in this case, your Raspberry Pi.
To set up port forwarding, follow these steps:
- Log in to your router’s admin interface.
- Find the port forwarding section (it might be labeled as virtual servers or application sharing).
- Add a new rule and specify the following details:
- External port: The port number you want to use for remote access (e.g., 8080).
- Internal IP: The static IP address of your Raspberry Pi.
- Internal port: The port number your Raspberry Pi is listening on (e.g., 80).
Once you’ve added the rule, save your changes and test the connection. If everything is set up correctly, you should now be able to access your Raspberry Pi from outside your network.
Securing Your IoT Connection
Hold up! Before you start celebrating, let’s talk about security. Exposing your IoT devices to the internet comes with risks, so it’s crucial to take precautions. Here are a few tips to keep your setup safe:
- Use strong passwords for your Raspberry Pi and router.
- Enable firewall rules to block unwanted traffic.
- Consider using a VPN for added protection.
- Regularly update your software to patch vulnerabilities.
Remember, security isn’t just a one-time task—it’s an ongoing process. Stay vigilant and keep an eye on your network for any suspicious activity.
SSH Security Best Practices
If you’re using SSH to connect to your Raspberry Pi, make sure to:
- Disable password authentication and use public key authentication instead.
- Change the default SSH port to something less obvious (e.g., 2222).
- Limit SSH access to specific IP addresses if possible.
Dynamic DNS Explained
Okay, so you’ve got your Raspberry Pi set up, your router configured, and your ports forwarded. But there’s one more piece of the puzzle: dynamic DNS. Most home internet connections use dynamic IP addresses, which means your public IP can change without warning. This makes it difficult to establish a stable connection to your IoT devices.
Enter dynamic DNS. Services like No-IP and DuckDNS allow you to assign a domain name to your public IP address, even if it changes. Here’s how to set it up:
- Sign up for a free account with a dynamic DNS provider.
- Create a hostname and note down the update URL.
- Install the dynamic DNS client on your Raspberry Pi and configure it with your provider’s details.
With dynamic DNS in place, you’ll always have a reliable way to access your IoT devices, no matter what your public IP is.
Setting Up Remote Access
At this point, you’re almost ready to access your IoT devices from anywhere. The final step is setting up remote access. There are several ways to do this, but we’ll focus on two of the most popular methods: SSH and web-based interfaces.
SSH Access
SSH (Secure Shell) is a secure way to connect to your Raspberry Pi from another computer. To access your Pi remotely:
- Install an SSH client like PuTTY (Windows) or use the built-in terminal (Mac/Linux).
- Enter your Raspberry Pi’s public IP address or dynamic DNS hostname.
- Log in using your Pi’s username and password.
Web-Based Interfaces
If you prefer a graphical interface, consider setting up a web server on your Raspberry Pi. This allows you to access your IoT devices through a browser. Popular options include:
- Node-RED for visual programming and automation.
- Home Assistant for home automation and device management.
- Mosquitto for MQTT-based communication.
Choose the option that best fits your needs and follow the installation instructions provided by the respective software.
Troubleshooting Common Issues
Even with the best-laid plans, things can go wrong. Here are some common issues you might encounter and how to fix them:
- Can’t connect to Raspberry Pi: Double-check your IP address, port forwarding settings, and firewall rules.
- Dynamic DNS not updating: Ensure the client is running on your Raspberry Pi and verify your provider’s settings.
- Slow connection: Optimize your network settings and consider upgrading your internet plan if necessary.
If all else fails, consult the documentation for your router, Raspberry Pi, and any software you’re using. Chances are, someone else has encountered the same issue and posted a solution online.
Best Practices for IoT Deployment
As you embark on your IoT journey, here are a few best practices to keep in mind:
- Plan your project thoroughly before diving in.
- Document your setup process for future reference.
- Test your system regularly to ensure everything is working as expected.
- Stay up to date with the latest developments in IoT technology.
By following these guidelines, you’ll set yourself up for success and avoid unnecessary headaches down the road.
Wrapping It All Up
And there you have it—a comprehensive guide to accessing IoT devices behind your router using Raspberry Pi. From setting up your Pi to configuring your router and securing your connection, we’ve covered all the essential steps to help you achieve remote access


