How To Monitor Raspberry Pi Remotely Like A Pro
Monitoring your Raspberry Pi remotely has become more than just a tech hobby—it's a necessity for many projects and setups today. Whether you're tinkering with home automation systems, building IoT devices, or even running a media server, knowing how to keep tabs on your Pi from afar is crucial. The beauty of Raspberry Pi lies in its versatility, but without proper remote monitoring, you might miss out on some of its full potential. This guide will walk you through everything you need to monitor your Raspberry Pi remotely, step by step.
Let's face it—technology can get tricky sometimes. But don't worry, because we're here to simplify things for you. Monitoring your Raspberry Pi remotely doesn't have to feel like solving a Rubik's Cube blindfolded. With the right tools and knowledge, you'll be able to keep an eye on your Pi's performance, troubleshoot issues, and manage it all from the comfort of your couch or even another country.
In this article, we'll cover everything from setting up SSH and VNC to using third-party apps that make remote monitoring a breeze. By the time you're done reading, you'll have all the skills you need to turn your Raspberry Pi into a remotely accessible powerhouse. So grab a coffee, sit back, and let's dive in!
Table of Contents
- Why Monitor Raspberry Pi Remotely?
- Basic Setup for Remote Access
- Using SSH to Monitor Raspberry Pi
- Setting Up VNC for Remote Desktop Access
- Third-Party Tools for Remote Monitoring
- Securing Your Remote Connections
- Monitoring Performance Metrics
- Common Issues and Troubleshooting
- Best Practices for Remote Monitoring
- Conclusion: Take Control of Your Pi
Why Monitor Raspberry Pi Remotely?
First things first—why bother with remote monitoring in the first place? Well, let me tell you, there are plenty of good reasons. Imagine being able to check on your Pi's status without physically being in the same room or even the same city. You can update software, troubleshoot problems, and manage files all from your phone or laptop. That's convenience at its finest.
Remote monitoring also opens up new possibilities for your projects. If you're running a home security system or weather station, you'll want to keep an eye on things no matter where you are. Plus, if something goes wrong, you won't have to rush home to fix it. You can tackle the issue remotely and save yourself a lot of hassle.
Key Benefits of Remote Monitoring
- Access your Raspberry Pi from anywhere in the world
- Perform maintenance tasks without needing physical access
- Monitor performance metrics in real-time
- Enhance security by keeping tabs on suspicious activity
Basic Setup for Remote Access
Before we dive into the specifics, let's cover the basics. To monitor your Raspberry Pi remotely, you'll need a few things in place. First and foremost, your Pi should be connected to a stable internet connection. Without that, remote access won't work. Next, you'll need to configure your network settings to allow incoming connections. Don't worry—I'll walk you through that part later.
Another important step is ensuring your Pi is up to date. Run the following commands to update your system:
sudo apt update && sudo apt upgrade
Once your system is updated, you're ready to move on to the next steps. Oh, and one more thing—make sure you know your Pi's IP address. You'll need it to connect remotely.
What You'll Need
- A Raspberry Pi with Raspbian OS installed
- A stable internet connection
- Your Pi's IP address
- A basic understanding of Linux commands
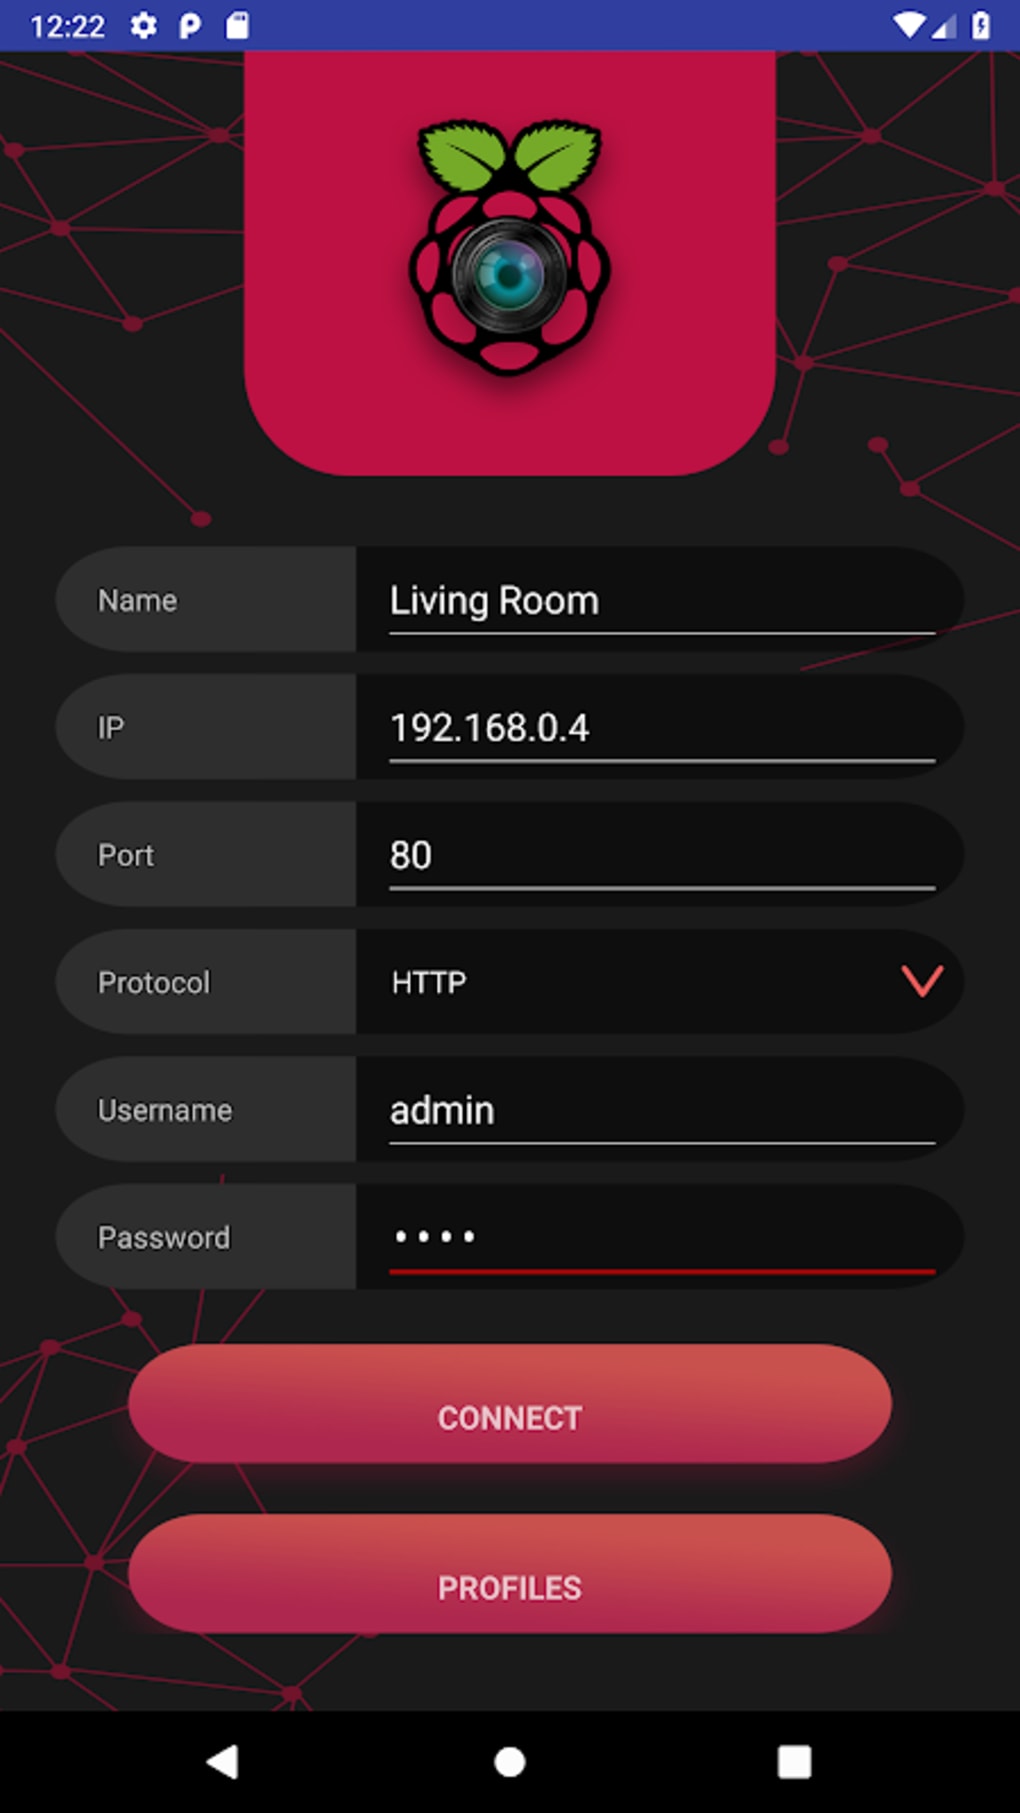
Using SSH to Monitor Raspberry Pi
SSH, or Secure Shell, is one of the most popular methods for accessing your Raspberry Pi remotely. It's secure, easy to set up, and works like a charm. To get started, you'll need to enable SSH on your Pi. Here's how:
Open the terminal on your Pi and type:
sudo raspi-config
From there, navigate to "Interfacing Options" and enable SSH. Once it's enabled, you can connect to your Pi from another device using an SSH client. On Windows, you can use PuTTY, while macOS and Linux users can simply use the terminal.
Connecting via SSH
Here's the command you'll need to connect:
ssh pi@your-pi-ip-address
Replace "your-pi-ip-address" with your Pi's actual IP address. You'll be prompted to enter your password, and voila—you're in! Now you can run commands, manage files, and do pretty much anything you need to do.
Setting Up VNC for Remote Desktop Access
Sometimes, you just need to see what's happening on your Pi's desktop. That's where VNC comes in. VNC allows you to access your Pi's graphical interface remotely, making it perfect for tasks that require a bit more interaction.
To set up VNC, follow these steps:
1. Install the VNC server on your Pi:
sudo apt install realvnc-vnc-server realvnc-vnc-viewer
2. Enable VNC in raspi-config:
sudo raspi-config
3. Navigate to "Interfacing Options" and enable VNC.
Once VNC is set up, you can connect to your Pi using a VNC client on your computer or phone. It's that simple!
Advantages of VNC
- Full desktop access
- Easy to use for beginners
- Compatible with multiple devices
Third-Party Tools for Remote Monitoring
While SSH and VNC are great, sometimes you want something a little more advanced. That's where third-party tools come in. There are plenty of apps and services that make remote monitoring a breeze. Some popular options include:
Popular Tools
- TeamViewer: Easy to set up and use
- ngrok: Creates secure tunnels for remote access
- Adafruit IO: Great for IoT projects
Each tool has its own strengths, so it's worth trying a few to see which one works best for your needs.
Securing Your Remote Connections
Security is always important, especially when it comes to remote access. The last thing you want is for someone to hack into your Pi and cause chaos. To keep your connections secure, follow these tips:
- Use strong passwords
- Enable two-factor authentication
- Restrict access to specific IP addresses
- Keep your software up to date
By taking these precautions, you'll greatly reduce the risk of unauthorized access.
Monitoring Performance Metrics
Knowing how your Pi is performing is key to keeping it running smoothly. There are several tools you can use to monitor CPU usage, memory, disk space, and more. One of the simplest tools is htop, which gives you a real-time view of your Pi's resources.
To install htop, run:
sudo apt install htop
Once installed, you can launch it by typing:
htop
Now you'll have a clear picture of what's going on under the hood.
Common Issues and Troubleshooting
Even the best setups can run into problems sometimes. Here are a few common issues you might encounter and how to fix them:
- Connection refused: Check your firewall settings and ensure SSH/VNC is enabled
- Slow connection: Optimize your network or switch to a wired connection
- Lost connection: Restart your Pi or check your internet connection
By troubleshooting these issues, you'll keep your remote monitoring setup running smoothly.
Best Practices for Remote Monitoring
To get the most out of your remote monitoring setup, follow these best practices:
- Regularly update your software
- Back up important data
- Test your connections regularly
- Document your setup for future reference
These practices will help you maintain a reliable and secure remote monitoring system.
Conclusion: Take Control of Your Pi
Monitoring your Raspberry Pi remotely doesn't have to be complicated. With the right tools and knowledge, you can keep tabs on your Pi from anywhere in the world. Whether you're using SSH, VNC, or third-party apps, the possibilities are endless.
So what are you waiting for? Dive in, experiment, and take control of your Pi. And don't forget to share your experiences in the comments below. Who knows—you might just inspire someone else to try it out!
Until next time, happy tinkering!
