How To Use SSH Device From Anywhere: The Ultimate Guide For Remote Access
Are you tired of being tied to your office desk just to access your server? What if I told you there’s a way to connect to your SSH device from anywhere in the world? Yup, it’s totally doable, and I’m here to spill all the tea. SSH, or Secure Shell, is your golden ticket to secure remote access. Whether you’re a tech-savvy pro or a newbie trying to wrap your head around this concept, this guide will walk you through everything you need to know. So buckle up, because we’re about to dive deep into the world of SSH.
Let’s be real—working remotely has become the new norm. Whether you’re managing a server, debugging code, or just checking in on your digital empire, having access to your SSH device from anywhere is a game-changer. But with so many tutorials out there, it can get overwhelming. That’s why we’ve put together this step-by-step guide to make your life easier. No fluff, just actionable tips.
Before we dive in, let’s clear the air. SSH isn’t just for tech wizards anymore. It’s a tool that empowers anyone to securely access their devices from anywhere. By the end of this article, you’ll know exactly how to set it up, troubleshoot common issues, and even beef up your security. Ready? Let’s get rolling.
What Exactly is SSH and Why Should You Care?
First things first, let’s break down what SSH really is. SSH stands for Secure Shell, and it’s like a secret handshake that lets you communicate with your remote devices securely. Think of it as a secure tunnel between your computer and the server you’re trying to access. Unlike other methods, SSH encrypts your data, keeping prying eyes away from sensitive information.
Why should you care? Well, in today’s digital age, security is everything. Whether you’re a business owner, a developer, or just someone who wants to keep their personal data safe, SSH is your best friend. It’s not just about convenience—it’s about protecting what matters most.
Here are a few reasons why SSH rocks:
- Encrypted communication to keep your data safe
- Easy to set up once you know the drill
- Works seamlessly across different platforms
- Perfect for remote work and server management
Why Use SSH Device From Anywhere?
Now that we’ve established what SSH is, let’s talk about why using it from anywhere is such a big deal. Picture this: you’re on vacation in Bali, sipping a piña colada, and suddenly you get an alert that your server is down. Panic sets in, but then you remember—you’ve got SSH set up. With a few taps on your phone or laptop, you’re back in control. Sounds dreamy, right?
Using SSH from anywhere gives you the freedom to manage your devices without being tied to a specific location. Whether you’re troubleshooting a server issue, accessing files, or running commands, SSH lets you do it all from the comfort of your couch—or anywhere else in the world.
Setting Up SSH Access: The Basics
Step 1: Install an SSH Client
Before you can use SSH, you’ll need an SSH client. If you’re on a Mac or Linux machine, you’re in luck—SSH comes pre-installed. For Windows users, you’ll need to download a client like PuTTY or use the built-in Windows Subsystem for Linux (WSL).
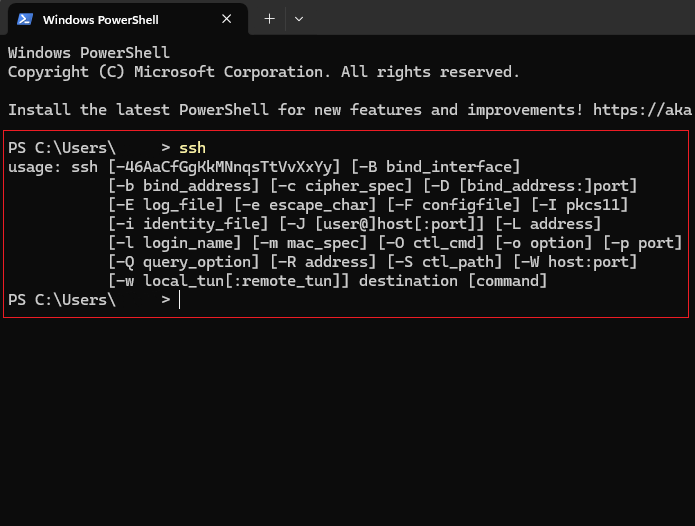
Here’s how to check if SSH is already installed on your machine:
- Open your terminal or command prompt
- Type `ssh` and hit Enter
- If it works, congrats—you’re good to go!
Step 2: Generate SSH Keys
SSH keys are like digital passports that let you access your devices without needing a password every time. To generate SSH keys:
- Open your terminal
- Type `ssh-keygen -t rsa -b 4096` and hit Enter
- Follow the prompts to save the key (you can leave the default location)
- Set a passphrase if you want extra security
Pro tip: Save your private key in a secure location. If you lose it, you’ll have to generate a new one.
Configuring Your SSH Server
Step 1: Install SSH on Your Server
If you’re setting up SSH for the first time, you’ll need to install an SSH server on your remote device. For most Linux distributions, you can do this by running:
`sudo apt-get install openssh-server`
Once it’s installed, make sure the SSH service is running by typing:
`sudo systemctl status ssh`
Step 2: Configure SSH Settings
To make your SSH connection more secure, you’ll want to tweak the default settings. Open the SSH configuration file with:
`sudo nano /etc/ssh/sshd_config`
Here are a few changes you can make:
- Change the default port (22) to something less obvious
- Disable password authentication to force key-based access
- Restrict access to specific IP addresses if needed
Once you’ve made your changes, restart the SSH service with:
`sudo systemctl restart ssh`
Connecting to Your SSH Device
Now that everything is set up, it’s time to connect to your SSH device. Here’s how:
`ssh [username]@[IP address] -p [port number]`
For example:
`ssh admin@192.168.1.100 -p 2222`
If you’ve set up key-based authentication, you’ll be prompted to enter your passphrase instead of a password. Once you’re in, you’ll have full access to your device.
Securing Your SSH Connection
Security is key when it comes to SSH. Here are a few tips to keep your connection safe:
- Use strong, unique passwords for your SSH keys
- Enable two-factor authentication (2FA) if possible
- Monitor login attempts for suspicious activity
- Regularly update your SSH server and client software
Remember, the more layers of security you add, the harder it is for hackers to break in.
Troubleshooting Common SSH Issues
Even the best-laid plans can go awry. Here are some common SSH issues and how to fix them:
Issue 1: Connection Refused
If you’re getting a “Connection refused” error, double-check the following:
- Your SSH server is running
- The IP address and port number are correct
- Your firewall isn’t blocking the connection
Issue 2: Permission Denied
This usually happens when your SSH keys aren’t set up correctly. Try regenerating your keys or checking the permissions on your key files.
Advanced SSH Techniques
Once you’ve mastered the basics, it’s time to level up your SSH game. Here are a few advanced techniques to try:
Tunneling
SSH tunneling lets you forward traffic from one port to another securely. This is great for accessing services behind firewalls or encrypting unsecured connections.
Port Forwarding
Port forwarding allows you to access services on your local network from anywhere. For example, you could use it to access your home media server while you’re on the go.
How to Use SSH on Mobile Devices
Believe it or not, you can use SSH on your phone too! There are plenty of apps available for both iOS and Android that make remote access a breeze.
iOS
For iPhone users, apps like Serverauditor and Termius are great options. They offer a user-friendly interface and support key-based authentication.
Android
On Android, you can try apps like JuiceSSH or ConnectBot. Both are highly rated and offer a wide range of features.
Conclusion: Take Control of Your SSH Device From Anywhere
There you have it—everything you need to know about using SSH from anywhere. Whether you’re a seasoned pro or a newbie, SSH is a powerful tool that can transform the way you work. By following the steps in this guide, you’ll be able to securely access your devices from anywhere in the world.
Now it’s your turn. Have you tried using SSH remotely? What challenges did you face? Let us know in the comments below, and don’t forget to share this article with your tech-savvy friends. Together, let’s make remote work a little easier—one SSH connection at a time.
Table of Contents
- What Exactly is SSH and Why Should You Care?
- Why Use SSH Device From Anywhere?
- Setting Up SSH Access: The Basics
- Configuring Your SSH Server
- Connecting to Your SSH Device
- Securing Your SSH Connection
- Troubleshooting Common SSH Issues
- Advanced SSH Techniques
- How to Use SSH on Mobile Devices
- Conclusion: Take Control of Your SSH Device From Anywhere
