Access IoT Behind Router Raspberry Pi Example: Your Ultimate Guide
Hey there, tech enthusiasts! If you're diving into the world of IoT and Raspberry Pi, you're in the right place. Accessing IoT devices behind a router using Raspberry Pi is not just a fun project but also a practical way to enhance your home automation skills. In this guide, we'll explore how to set up and access IoT devices remotely using Raspberry Pi as a powerful tool. Let's get started, shall we?
Imagine having full control over your smart home devices from anywhere in the world. Sounds cool, right? But here's the thing: setting up IoT devices behind a router can sometimes feel like solving a puzzle. That's where Raspberry Pi comes in. It acts as the brain of your smart home setup, allowing seamless communication between devices and your network. This article will break it down step by step, so even if you're a beginner, you'll walk away with a solid understanding.
Before we dive deeper, let me tell you why this topic matters. In today's interconnected world, IoT devices are everywhere. From smart thermostats to security cameras, these gadgets make our lives easier. But what happens when you want to access them remotely? That's where Raspberry Pi shines. By following this guide, you'll learn how to configure your network, set up port forwarding, and create a secure connection to access your IoT devices from anywhere. Ready to level up your tech skills?
Understanding IoT and Raspberry Pi
First things first, let's talk about what IoT and Raspberry Pi actually mean. IoT stands for Internet of Things, which refers to the network of physical devices embedded with sensors, software, and connectivity. On the other hand, Raspberry Pi is a tiny yet powerful computer that can be used for a variety of projects, including IoT setups.
Why Use Raspberry Pi for IoT?
Here are a few reasons why Raspberry Pi is perfect for IoT projects:
- Cost-effective: Raspberry Pi is affordable compared to other solutions.
- Flexibility: You can customize it to suit your specific needs.
- Community support: A vast community of developers and enthusiasts is always ready to help.
- Compatibility: Works seamlessly with a wide range of sensors and devices.
These factors make Raspberry Pi an ideal choice for anyone looking to experiment with IoT.
Setting Up Your Raspberry Pi
Before you can access IoT devices behind a router, you need to set up your Raspberry Pi properly. Here's a quick guide to get you started:
What You'll Need
- Raspberry Pi (any model will do)
- MicroSD card with Raspberry Pi OS installed
- Power supply
- Keyboard, mouse, and monitor (optional)
Once you have all the necessary components, follow these steps:
1. Insert the microSD card into your Raspberry Pi and power it on.
2. Connect to your Wi-Fi network by going to the network settings.
3. Update your system by running sudo apt update and sudo apt upgrade.
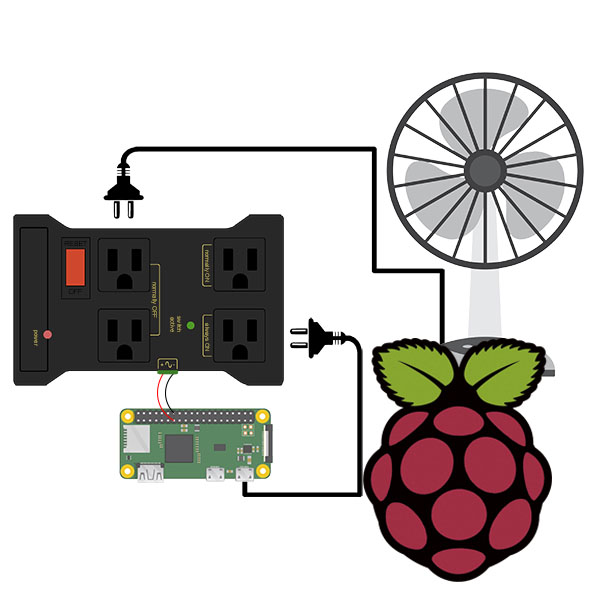
Access IoT Devices Behind Router Raspberry Pi Example
Now that your Raspberry Pi is set up, it's time to tackle the main challenge: accessing IoT devices behind a router. This involves configuring your network settings and ensuring secure communication between devices.
Step 1: Identify Your IoT Devices
The first step is to identify the IoT devices you want to access remotely. Make a list of all the devices and their IP addresses. This will help you keep track of everything and avoid confusion later on.
Step 2: Configure Port Forwarding
Port forwarding is a crucial step in accessing IoT devices behind a router. Here's how to do it:
- Log in to your router's admin panel.
- Find the port forwarding section.
- Add a new rule, specifying the external and internal ports.
- Save the settings and test the connection.
Remember to choose a unique port number to avoid conflicts with other services.
Step 3: Set Up a Static IP Address
Assigning a static IP address to your Raspberry Pi ensures that its network address remains consistent. Here's how to do it:
1. Open the terminal and run sudo nano /etc/dhcpcd.conf.
2. Add the following lines at the bottom of the file:
interface eth0
static ip_address=192.168.1.100/24
static routers=192.168.1.1
static domain_name_servers=192.168.1.1
3. Save the file and reboot your Raspberry Pi.
Securing Your IoT Network
Security should always be a top priority when working with IoT devices. Here are some tips to keep your network safe:
Use Strong Passwords
Make sure all your devices and accounts have strong, unique passwords. Avoid using easily guessable combinations like "123456" or "password."
Enable Firewall Protection
A firewall acts as a barrier between your network and potential threats. You can enable the firewall on your Raspberry Pi by installing ufw:
1. Run sudo apt install ufw.
2. Allow SSH access by running sudo ufw allow ssh.
3. Enable the firewall with sudo ufw enable.
Regularly Update Your System
Keeping your Raspberry Pi and IoT devices up to date is essential for security. Regular updates patch vulnerabilities and ensure that your system remains protected.
Connecting IoT Devices to Raspberry Pi
Now that your Raspberry Pi is configured, it's time to connect your IoT devices. Here's how to do it:
Using MQTT for Communication
MQTT (Message Queuing Telemetry Transport) is a lightweight protocol ideal for IoT communication. To use MQTT, you'll need to install a broker on your Raspberry Pi:
1. Install Mosquitto by running sudo apt install mosquitto mosquitto-clients.
2. Configure the broker by editing the mosquitto.conf file.
3. Test the connection using the mosquitto_pub and mosquitto_sub commands.
Once the broker is set up, you can connect your IoT devices and start sending and receiving messages.
Troubleshooting Common Issues
Even with the best preparation, issues can arise. Here are some common problems and their solutions:
Device Not Connecting
If your IoT device isn't connecting, check the following:
- Ensure the device is powered on and within range.
- Verify the IP address and port settings.
- Restart the router and Raspberry Pi.
Slow Network Performance
Slow performance can be caused by several factors:
- Overloaded router or network congestion.
- Interference from other devices.
- Outdated firmware or drivers.
Addressing these issues can significantly improve your network's performance.
Best Practices for IoT Projects
To ensure success in your IoT projects, follow these best practices:
Plan Your Setup
Before diving in, plan your setup carefully. Identify your goals, choose the right hardware, and map out the connections between devices.
Document Your Progress
Keeping a detailed record of your setup and configuration can save you time and headaches in the future. Write down IP addresses, port numbers, and any other relevant information.
Stay Updated
Technology evolves rapidly, so staying informed about the latest trends and advancements is crucial. Follow tech blogs, join online communities, and attend workshops to keep your skills sharp.
Conclusion and Call to Action
In conclusion, accessing IoT devices behind a router using Raspberry Pi is a rewarding endeavor that opens up endless possibilities for home automation and beyond. By following the steps outlined in this guide, you can create a secure and efficient setup that meets your needs. Remember to prioritize security, document your progress, and stay updated with the latest developments in the IoT world.
Now it's your turn! If you found this guide helpful, share it with your friends and fellow tech enthusiasts. Leave a comment below with your thoughts or questions, and don't forget to explore more articles on our site. Happy tinkering and good luck with your IoT projects!
Table of Contents
- Access IoT Behind Router Raspberry Pi Example: Your Ultimate Guide
- Understanding IoT and Raspberry Pi
- Why Use Raspberry Pi for IoT?
- Setting Up Your Raspberry Pi
- What You'll Need
- Access IoT Devices Behind Router Raspberry Pi Example
- Step 1: Identify Your IoT Devices
- Step 2: Configure Port Forwarding
- Step 3: Set Up a Static IP Address
- Securing Your IoT Network
- Use Strong Passwords
- Connecting IoT Devices to Raspberry Pi
- Using MQTT for Communication
- Troubleshooting Common Issues
- Device Not Connecting
- Slow Network Performance
- Best Practices for IoT Projects
- Plan Your Setup


